How to Create a Digital Vision Board
I have always loved the idea of a vision board. I really believe visual inspiration is very effective. I have one problem though. I literally have no where to put one. I've moved my office 3 times in the last six months...
This Spring we made a lot of changes to our home. Our family was growing and we were busy playing switcheroo with rooms trying to find the best spot for this kid and that kid, mom's office, and mom's other office. I finally ended up in a good spot, but there's just no room for a big vision board like the ones you see all over Pinterest. I also don't want one hanging up where my office is either. So, I had to get creative. Which means...I went to Pinterest and started pinning away!
I knew this wasn't the way I wanted to visualize my goals because let's face it, I can't focus on Pinterest. I'm all over the place. One minute I'm looking up hairstyles and the next I'm looking up homeschool ideas for the kids. Then I thought, this was actually a really great starting point though. So, I just kept on pinning and it finally led to the ideal vision board! Let me show you how I did it.
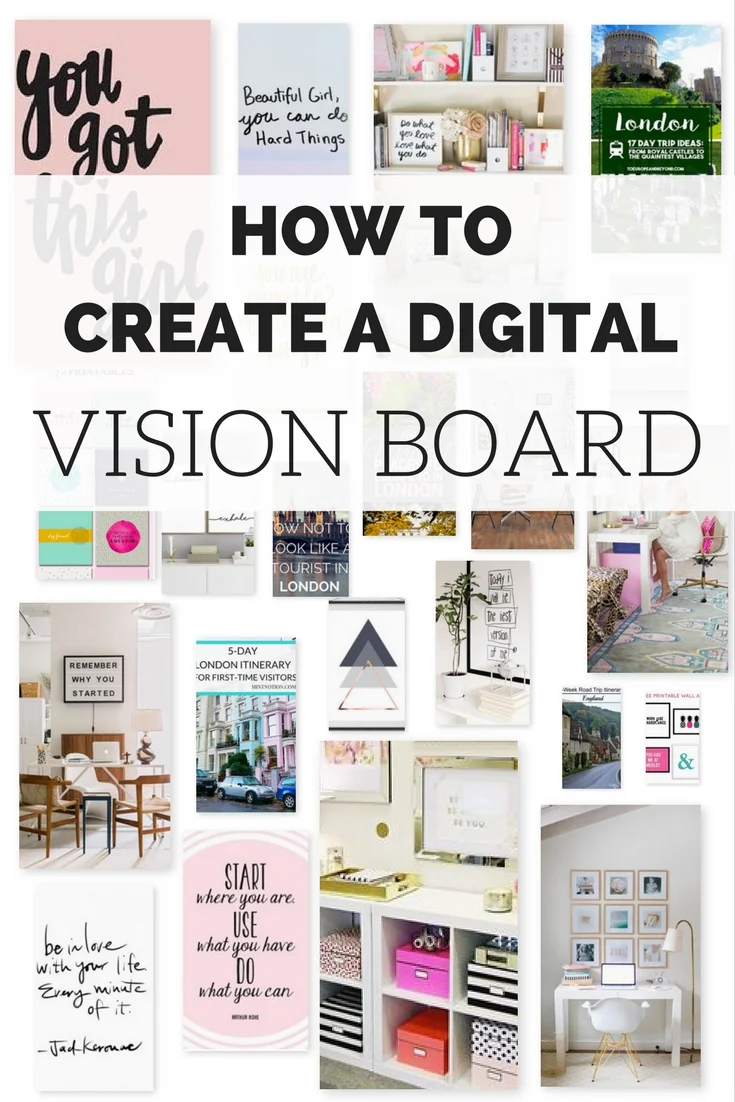
This vision board is purely business goals. Since I'm going digital, I'm going to categorize my visions. So, I will create a business board, health board, and maybe a home board. That's off the top of my head right now, but you get where I'm going.
Here are the "topics" of my business vision board:
Office space inspiration
Wall decor
Motivational quotes
Vacation goals
The Creative process:
I went and pinned around 5 different pins from each topic to a new board I created in Pinterest.
Then I took a screenshot of each pin and saved them to my desktop.
I opened up Canva and I chose to create my own design. I used custom dimensions of 800/600 (because I wanted to use this as a screen background.)
I drug all of my screenshots that were saved to my desktop over to my Canva photo uploads.
I decided against their layouts because it messed with the photos too much. So, I went ahead and grabbed some rectangle frames as most of my photos were that size anyway.
Then I went ahead and started dragging pictures over and rearranging them until I was satisfied with the look.
Finally, I saved the image to my computer and used it as my desktop background.
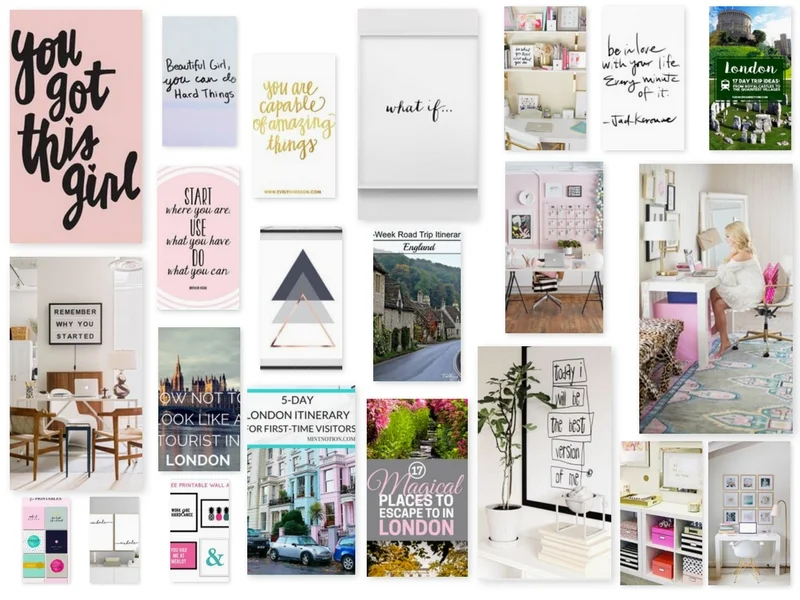
And that's it! What took the longest was making my template in Canva, but I kept you in mind and I created two templates for you to use! So this will literally take you minutes!
So, now I don't have to have a bulletin board up or random pieces of paper on my wall. I can just save the image on my desktop or print it out on one page and clip it into my planner. Easy peasy.